Sunday, August 18, 2013

Brooch

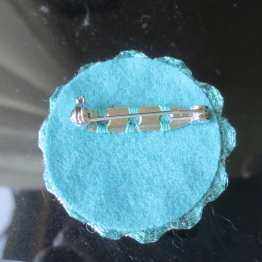
I finished the brooch!


It turned out well.  I wasn't sure I could make the scallops around the edge look even but they turned out okay.  They don't stick out very much.   I wasn't sure about gluing the back and front together even though that is what the directions tell you to do.

I would feel much better if it were sewn around the edge.  I have enough stuff to make another one.  But I really want to make the heart brooch kit next.  Now I can say that I have some experience under my belt working with metal threads.  I'm sure I could do it better next time.

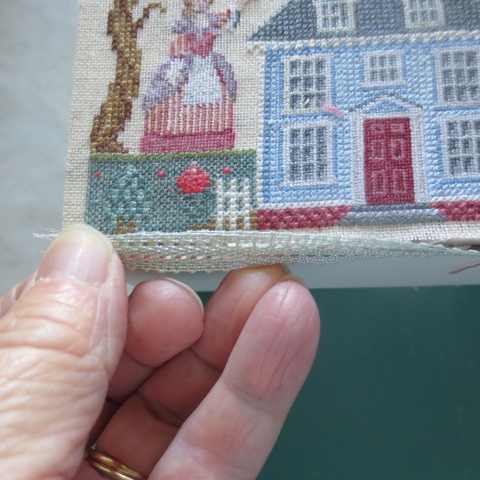
I finished stitching Pocket for Posies.  Now comes the putting it all together part.  I have a few questions about the finishing.

 There are many photos of the process so that is helping me.  We'll see how I do.
A

Saturday, August 17, 2013

Goofing

I did some more gluing on my trinket box.  The hand marbled paper is glued to the under side of the lid.

 The linen is glue to the top of the lid.  I wish the edge was glued more securely.  See that corner sticking up?  On my own, I would just staple it to the lid.  But that's not politically correct.

Then I decided to experiment with the lining that had bubbles in it.  What the heck?  It's ruined anyway.   I thought, I wonder if I can pull the paper off?  Yes.  I wonder if I can re-glue it?  Yes. Now I was worried about putting the glued paper on the silk in the first place, as you are never supposed to even use steam on silk.  It can leave spots.  Will the glue that has been mixed with water leave spots?  Not really.
I need to make a new bottom lining, this one is looking a little worn and has a bubble.

 How do I get the lining to fit in the box?  It didn't want to go in. It was fighting me.   So I folded it at the corners.  I bet I can cut off the bottom, I don't mind a raw edge on the bottom.  Uh-oh, some of the wood showed  when I did that, even when I put the bottom in.  And the lid didn't sit down in the box because the lining was in the way.  Okay, I'll recess the lining about an eighth of an inch and fold the bottom in an eighth of an inch.  Hey, no wood shows and the lid will sit down in the box.  This lining doesn't look so bad.  Maybe I can reuse it.

The last folded edge looks pretty crappy though.  I'll have to iron it down to make it look nice and neat.
Purple and coral?  Interesting color combination.

So I'm thinking of just gluing in the reglued lining.  I would like to fold the silver tape that goes around the top edge of the lid in half.  It doesn't seem to want to fold.  I may experiment with that.  Run the folded tape through a pasta maker?  Pound the folded tape with a mallet?  We'll see. . . .

I got the spine of Along the River James stitched.  I wish this project had a whole complete chart.  We don't even have a complete chart of the border, only one quarter.  Good grief.  No wonder I've made some mistakes.

Time for lunch.
A

Friday, August 16, 2013

More Glue

My goal for yesterday was to get the paper glued to the trinket box.  I did it!

 It was fun to trim off the excess paper this morning and see that it looks good.  I am also happy with the lid.

  It was suggested that a ruler could help push the paper onto the under side of the box lid but I realized (too late!) that there was ink on the side of the ruler. So I have an ink smudge on the paper that is on the underside of the lid.

 Unfortunately, I don't think this will be covered up with anything.  Live and learn.   I made a quick trip to Target this morning for clothespins.  They will hold the stamped edge that will be glued around the top of the box like this.

 The pieces are all cut and just need to be glued.  There is a problem with the lining.

 Evidently I missed getting glue on a couple of spots on the paper that the lining is glued to.  They show up.  Luckily I have enough silk to try again.  I think this will be the hardest part, glueing the lining in the box.  Now I just couldn't leave that top edge raw.  So I folded it over and glued it.

 I'm going to do that when I redo the lining too.  Then there is the inside bottom piece.  I'm going to fold over and glue those edges too.  I am happy with how the linen glued to the paper.

 I was worried about that.  Would glue soak through?  Would the linen adhere to the paper well enough?  I've trimmed up the linen/paper and it looks good.  I'm ready to glue it to the top of the lid.  The bottom of the lid needs a piece of marbled paper glued on it.  Things are going well.


I'm an idiot, chapter 27.
Things are not going well on the Along the River James.  I miscounted.  I really was trying to follow the directions even though I would have stitched this in a different way.  I was stitching the border when I realized that I was ten stitches off when I backstitched this piece.  

I really didn't want to have to take out everything I've done so I worked the border to see if it will actually fit on the linen.  I am way too close to the edge but I think it will work out.  I don't have the finishing instructions so I'm not sure.  I've got my fingers crossed.
Back to gluing.
A

Thursday, August 15, 2013

Check and Glue

I put in the leaves on the Brooch.

The leaves turned out pretty well as I was afraid I didn't have enough room for them.  Then I started the filling in with the silver bright check purl.

 You have to cut it into tiny pieces and attach each piece.

When I look at the brooch with a magnifying glass, I see some more places that could use another piece of the silver bright check purl.  But to the naked eye it just looks sparkly.  I like the sparkly.

I have more of the check filling to do then I can plunge my stray threads to the back.  To me, this is looking a lot  like the photo so I am very happy with it.  I think I can finish this soon.

I was very brave yesterday.  I am afraid of finishing the trinket box in Cabinet of Curiosities.  But I got my ducks in a row and started.  I mixed two tablespoons of the glue mixture with half a cup of water in a disposable plastic container using a small whisk.

 I was worried about lumps in the glue.  But there weren't any!  It was fine.  So then I brushed it on the outside of the box.  Again, not a problem.  One lump formed as it was soaking in and drying but was easily brushed off.  The directions say to let it dry for half an hour.

 It took way longer than that.  After about three hours, I coated the inside of the box.  My goal today is to apply the paper to the box.  I want to apply the paper to the back of the stitching and the back of the lining silk as well.  I have to reread the directions as I'm not sure about when and how to put the stamped paper on the top edge.  I know that the bottom of the lid will be a little fiddly too.  Wish me luck!
A

Wednesday, August 14, 2013

So Far

I have had such fun working on my round brooch kit.  It doesn't feel like it is actually stitching as most of what I've done is couching threads.
This is the back:

Many of the ends of the threads are waiting to be plunged to the back later.  

I've only had a couple of "hiccups".  I went to make the squiggle and after one round, I realized I hadn't left any room for round two.  And I wanted more room for the squiggle so it wouldn't look flat.  So I took out the silver circle, made it smaller and redid the squiggle.  I am pretty happy with it.  I was tickled to get to the rose and I think it looks pretty good.

Now I have to add five leaves around the rose.  I put in one leaf but it was too big.  So I'm cutting down the metal thread and going to try again.  I'm look forward to filling in around the rose with the bits of check stuff.

 I am getting some experience using different threads.  I don't have the names straight yet.  Sometimes I wonder, why not use a bugle bead instead of cutting this metal thread that is not going to be as evenly sized?  I think this could look nice as a pendant too.  I would be more scared of working with these threads but I've done some work on the Mermaid Treasures with metal threads.  It's like everything I've done before is preparing me for this.
A

Tuesday, August 13, 2013

Great Mail

The mailman came to the door yesterday.  He brings me packages that are too big for the mailbox.  He knows I stand at the window and watch him as he delivers mail.  Sometimes he even waves to me.
I got four packages!  Wow.  It would be nice to get a package a day for four days just to stretch out the delight.  But I am not going to complain.

First off, I got an old Cricket Collection chart that I won on ebay.  It was only two dollars.

Then I got my order from Stitching Bits and Bobs.  They've set a record - this only took a tad over two weeks.  When you buy stash (as I did at Stitchville and Silver Needle) it means that you probably need more stash.  You buy a chart, you need the fabric and threads.  When you buy several (ahem) you need much more fabric and many more threads.  So most of this order was thread and fabric to stitch charts that I bought.

Then I got something on my wish list.  I wanted a GPA chart for a little box.  Romina's Box.  I looked for it at Silver Needle and Stitchville.  In a moment of weakness, I ordered it from Down Sunshine Lane.  They were out of it but sent it when it came in.  Cool.

And last but certainly not least is the package of two kits from England.  I am so tickled to get these.  They were mailed about two weeks ago so I've been looking for them every day.  I feel like I am taking a class with the Royal School of Needlework since the lady (Jenny Adin-Christie) that I bought the kits from teaches at the Royal School and worked on Kate's wedding dress.  I bought two brooch kits.

One is a heart and one round.  So of course, I had to start one.  I put the fabric in a hoop.  I even wrapped the hoop with strips of fabric to hold the fabric drum tight.  I am following the directions like a good girl.  She calls the fabric "calico" but it is more like a very heavy muslin. This is what was in the kit:


Wow, so many different threads that I haven't worked with before.  The directions are very good and like a book.  This is exciting.

I'll show you my progress tomorrow.
A

Monday, August 12, 2013

Rainy Monday

Because it was raining when I got up, my whole schedule had been changed for the day.  Instead of walking at a nearby park, I went to the Y and exercise class.  I am a creature of habit.  I like to start the bathroom cleaning at 9:00 a.m.  But today I didn't get started until nearly 11:00.  So I'm just now done.  Whew.


I worked a bit on all three of my WIP's.  The Mermaid's Treasures got a few stitches.  It doesn't look like much but I thought I would look and see how it was a week ago and see how much progress I have made.

Then I got the bank of the River James in and a bit more river.  I won't let myself work on this very much as I need to get other stuff done.  I love the effect of the offset straight stitches.  it looks like water.

Then I worked some on the Pocket for Posies pin cushion.  I can finish that part today for sure.

I have been reading the directions for finishing the trinket box.  I want to get started on that.  I don't have the sides stitched, just the top.  But that will be motivation, right?
A